wall
News, insight and general chit chat
August 1st, 2012
Wait – what’s that? You want me, Nik Faulkner, Head of Animation at Littleloud, to tell you about how I created this image that was featured in 3D Artist magazine? Of course! Littleloud love to talk about the creative process, and we really, really love expressive characters. So any excuse to spend some quality time talking about animation is pretty cool with us. Sit down, get a cuppa, and we can have a look at the process of making Tara come to life!
Concept
This image started with some research into generic character base meshes to be used for virtual sculpting. The concept of a good base mesh is to find a balance between having enough detail to show muscle flow, good topology and enough simplicity that the body shape can be changed easily to make whatever character is required. After a couple of days researching different approaches to topology and building her, she was quickly rigged with the in-house auto-rigger I’d developed for our character projects.
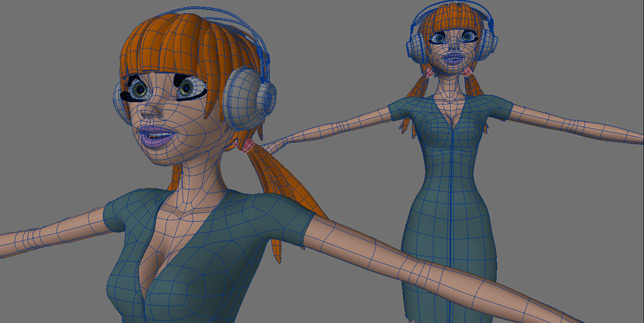
Base Mesh
My initial idea was to go for a virtual pinup, but with the express decision not to over-sexualise her. I’ve been a fan of Tara McPherson for a long time and although the final image doesn’t bear much resemblance to her work it did serve as a creative and directional springboard for me. I found some 60′s pinup photos of minidress clad girls lounging on the floor listening records and thought that these kind of images were iconic and fun to riff on. After more web research, the chair, headphones, tape recorder and set were quickly built and textured in less than a day and the composition was roughly laid out before doing first test poses.
Scene Setup
At this point I pretty much finalised my lighting and render settings. I used Lightwave’s fast final gather radiosity with 3 bounces, 2 large area lights (a warm main light and a colder fill light) and an HDRI image of a photo studio to give a bit of variation to the ambience and help with reflections and specular highlights.
Using the rig I finalised Tara’s pose. This being a still meant that I could be a lot less fussy about deformations in the shoulders and neck areas, traditionally places where a LOT of tweaking is required to get natural muscle flow and bending/deforming. The sculpting stage meant I could fix this very easily once the pose was finalised.
Sculpting
I sent the posed base mesh over to Sculptris. I first fixed any deformation issues on the shoulders, then refined the facial expression and softened the areas around the eyes, lips and side of nose. Detail was then added to the collar bones as well as softening and rounding the cleavage and adding a little definition on the knees.
If this was for animation I’d need to bake out normal and displacement maps to get the sculpt information onto the animation ready mesh – but as this was a still, I just replaced my pre-sculpt rigged mesh with the hi-poly sculpt.
Occlusion Pass
Props and Surfacing/Texturing
The last few steps involved modelling her hair, boots and dress. This was all pretty simple stuff using basic sub-d techniques and very quick UV-mapping on her body and apparel. I toyed with subsurface scattering for her skin, but didn’t find it as quick as I’d hoped – instead I opted for some post techniques that could give me near enough the look I was going for in much less time. a simple tiling texture for her dress, tiled hair diffuse map and eye textures from a previous project and sleeve tattoo stolen from my girlfriends arm. I do tend to use as many procedural textures as I can, thankfully lightwave is pretty well stocked in this department.
Render Passes
I rendered out various passes at a pretty hefty 4K resolution, just in case I wanted to print the result.
- a default, straight render (some people call this the “beauty pass”)
- an rgb pass with no lighting, this is almost a cel shading pass but has the added bonus of the detail from procedural surfaces
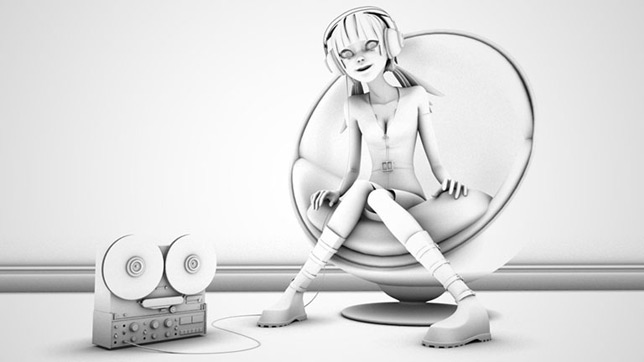
- an ambient occlusion pass, to pick out detail and help refine the radiosity
- a depth pass which I setup manually using fog rather than a depth buffer (i prefer to manually control this) this was used for depth of field in post as well as a very slight fog on the background.
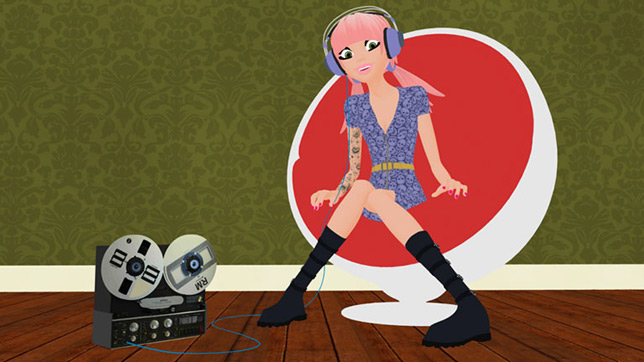
Cell Shaded Render
Post Production
I combined all the final elements in After Effects rather than Photoshop. I much prefer the After Effects workflow when it comes to multi-pass rendering. The implementation of adjustment layers alone is far superior for my way of working.
The comping of layers is pretty standard stuff: occlusion multiplied over beauty pass, lens blur for depth of field using the depth pass fog, depth pass screened over everything to add fog effects.
The only unusual thing I did was for the skin. I took my raw RGB pass, masked it so it was only the skin surface and overlaid it over the beauty pass. This essentially makes the skin surface look cel-shaded. By lowering the opacity of this layer you can slide between the more realistic render and the stylised cel render. For Tara the skin is roughly 70% beauty render and 30% cel render, with a very subtle After Effects glow added. Although this is nowhere near subsurface scattering, it’s a nice soft “un-CG” look that I think adds a lot and has pretty much no render hit.
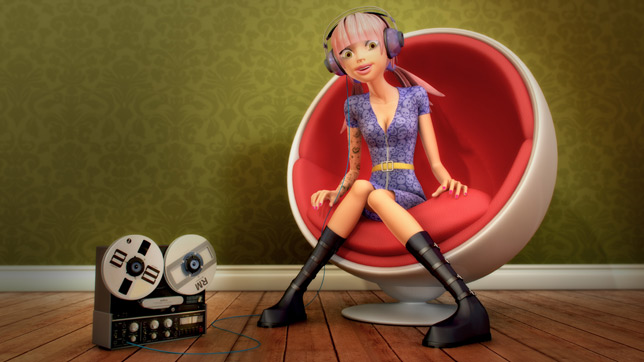
Finished Render
After all the above is tweaked to my satisfaction, an adjustment layer is added for final grading and post process image affects. Magic Bullet looks helps a lot with the final grade. I have a handful of custom presets that I’ve made over the years, so I started with one of these. I warmed the image up a bit, added some film grain, subtle chromatic aberration, a bit of diffusion and a very subtle vignette to draw your eye into the image.

We are a BAFTA winning creative studio originating meaningful games & experiences for broadcasters, brands & publishers.
FLICKR